On Assignment: Photography Equipment Macro
Ever wanted to take macro photos, but didn’t have a macro lens? That’s when it’s time to pull out an extension tube! An extension tube takes a regular lens and turns it into a macro lens by simply adding more space between it and the camera body. And what if you don’t have an extension tube? You can make one! I decided to turn this assignment into a DIY project to make my own extension tube, and I can’t believe how much I learned along the way!
If you already have a macro lens or an extension tube, use those for this assignment! If you have neither, then I would recommend buying an extension tube (or a set of them). They are very cheap, they don’t have to be name-brand, and the electrical communication with your lens will allow you to choose the best aperture for the best results.
However, if you have a manual-aperture lens or if you’re a curious person like me and like to make stuff just for the fun of it, you can certainly make your own extension tube!
The most important thing to consider is that a homemade extension tube works best with a manual-aperture lens. With no electrical communication between the camera and the lens, if you can not manually change the aperture on the lens, then the aperture will be stuck at it’s widest aperture all the time. And wide apertures create soft-focused photos due to the increased diffraction in macro photography. Let me show you what I mean.
This is as close as I could get with my 50mm lens without any extension tubes.
Then I mounted two, regular (non-homemade) 25mm extension tubes (which together made a 50mm extension tube).

See how soft it is? This photo was taken with an aperture of f/1.8. At first, I thought I had misfocused the shot. I also thought perhaps I had “bad” extension tubes. However, take a look at the following photos. The same, setup only at narrow apertures.
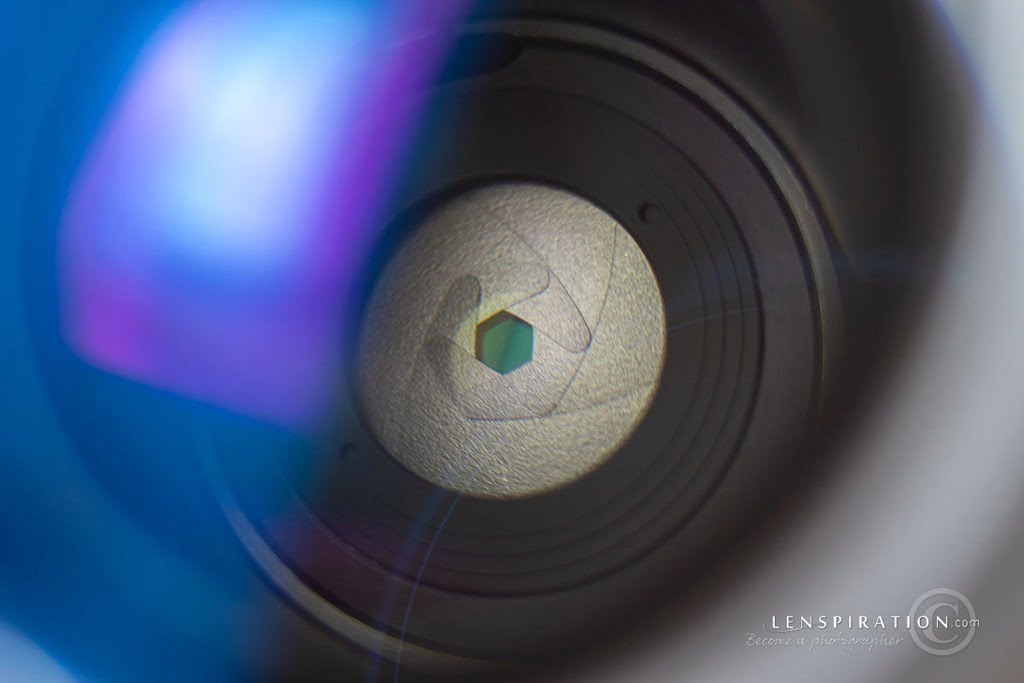
This is at f/2.8.

This one is at f/4.0. Getting better!

Here’s f/5.6. It’s acceptably in focus now.

F/8 is even better. (The scene changed slightly only because the lens was bumped or something, and I had to set up my subject again.)

And here’s f/11. As sharp as it’s going to get. (I’m pretty sure f/16 or higher would begin introducing blur from diffraction again.)
So, as you can see, when using an extension tube the best aperture is going to be somewhere around f/8!
This means using my f/1.8 50mm lens with my homemade extension tube is going to create very soft photos! That lens doesn’t allow me to change the aperture manually, so the aperture will be stuck at f/1.8 for every photo. A better option (if I didn’t have a manual-aperture lens) would be to pull out a kit lens that has a widest aperture of f/5.6 at 55mm!
So that’s the main thing there. If you can, use a manual-aperture lens if you’re going to create your own extension tube.
But here are some more things I learned while making my first extension tube:
- If you don’t have extra lens caps laying around like I do, I’m sure you can buy them for very cheap online.
- 1 1/2in PVC pipe worked perfectly for me. It was wide enough to enable me to drill a 1in hole, but narrow enough that it still fit flush on the flat area of the lens cap.
- It took me a little while to figure out how long to make my extension tube. But with the formula I mentioned in the video, it’s easy to figure out. Just take the focal length you’re going to use (50mm in my situation) and multiply it by 2 (100mm). Make your extension tube that length (100mm), and you’ll get 2x magnification (your subject will be twice the size of real life). Making my subject twice as big felt like overkill for me in this situation, so I kept my homemade extension tube at 50mm, giving me 1.5x magnification (so my subject was only one-and-a-half the size of real life).
- When cutting the PVC pipe, the cut needs to be 100% perfectly perpendicular! Cutting the pipe with a hand saw at first totally didn’t make the cut.
- I’m not sure how wide the holes need to be in the lens caps. That’s something I still need to research. But 1 1/8in is what I used based on a YouTube video, and it seems to be working fine.
- I had a terrible time drilling the holes in the lens caps! If you find a better way to drill them, let me know.
- I think gluing the sock on the inside of the white pipe worked! Do whatever you need to do to get the inside of the tube matte black (not shiny).
- When using an extension tube (homemade or not), there is a fixed focus distance. Stabilize your camera, place the subject in front of your lens, and then move it backward and forward until it’s properly focused.
Now, to show you the photos I took with my homemade extension tube!
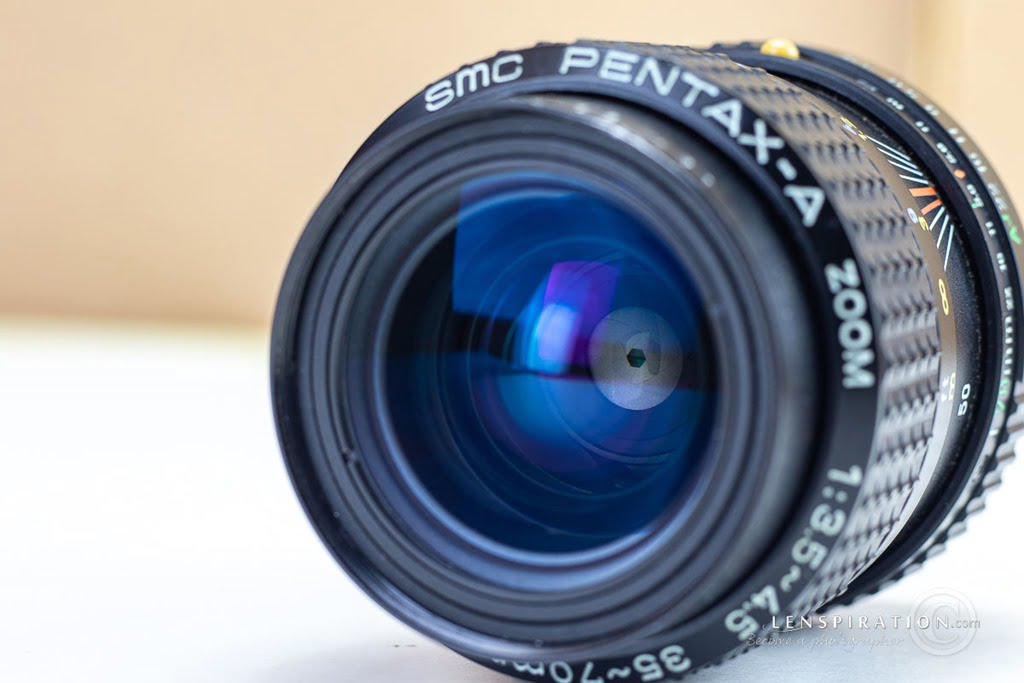
I connected the extension tube to an old Pentax 50mm manual-aperture lens. It’s one that my Grandpa gave me from back in the film days. I set the aperture to f/8, and placed my subject (a lens) in front of my camera and moved it into position to be in focus. And this was the result!

Even at f/8, it’s terrible! Why? I think there are two reasons.
First, because I used a transparent glue, light is leaking into the tube. This is what gives it the hazy look.
Second, because of the way I glued it, the extension tube (and thus the lens attached to it) is not 100% perfectly perpendicular to the camera. It’s pointing ever so slightly either up or down, right or left, or somewhere in between. This is what causes it to not look sharp.
So, I re-glued. This time, I used a thin layer of super glue. After that dried, I went around the outside with a bead of hot glue. It now appears to be light tight and perfectly perpendicular to the camera. And here are the results!


I was so thrilled! My homemade extension tube worked.
But now it’s your turn to shoot this assignment! Go gather the details for Photography Equipment Macro, and have some fun with it! Make sure to clean the equipment very well beforehand. Imperfections are mangified just as much as your subject. ![]() Can’t wait to see your photos!
Can’t wait to see your photos!
No comments yet.